

PECS Phase 2 Continued: Increasing Distance & Adding More Pictures
Increasing the Distance Between the Child and Her Communication Partner
Once your child is able to walk a few steps to the binder, start to increase the distance between your child and his communication partner. After your child walks the step or two to his binder, picks up the picture and then walks the step or two back to you, back up just a couple of steps. As you step back, look at your child and hold out your hand. This shows that you are ready to receive the picture. In the next clip, watch how the teacher moves a little further away on each trial, This makes the child work just a little bit harder each time to get the ball.
Again, you may need a helper here to prompt the child from behind. Have a helper with you, if possible, before trying this the first few trials. When your child is able to walk a few steps to you without any help, start showing him the reward you have from further and further away. Slowly increase the distance between you and the child until you are across the room from one another. You should be ten feet away. You can try making it just a little harder. In the next clip, notice how Dr. Bondy makes the child go a greater distance to make the exchange. He also makes the child move to a different position. While you are doing this, change roles with your helper, if you have one. That way, sometimes you are the communication partner and sometimes you are the helper. Also start introducing other communication partners. These can be, for example, other family members, close friends, and teachers.
used with permission from PECSUSA.com
Adding More Pictures
Keep teaching your child to work just a little harder to find his pictures and to reach you in order to make his request. At the same time, continue to add items, and pictures of those items. It is important that your child learns to ask for an increasing number of different things. But you will still be using only one picture at a time. That picture will show the item that you’re holding up for the child. Remember that it is important to add different types of items and their pictures. This could include things to eat and drink, favorite toys and activities, or anything your child enjoys that can be shown in a picture. Try to add as many new items as you can during Phase 2. Be sure to add at least 10 new pictures. Feel free to add as many more as you can. This will depend on how many different things your child enjoys.
Troubleshooting
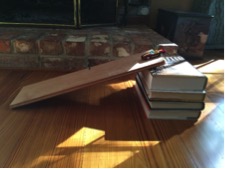
If you are finding it hard to add items and pictures because your child seems to enjoy only a small number of things, try out new items. To do this, offer your child things that are similar to something you know he really likes. For example, if your child has a favorite toy train, put that in your pocket while your child isn’t looking and then offer him a second train. This second train should be similar but maybe of a different color or size. Or it could be a small car that is similar in size to his favorite little train. See if you can engage him in some simple games with the new train or car, like sliding it down a ramp or racing two new vehicles together. (You can make a ramp by putting a few books underneath one end of a flat board.)
After your child has given a new vehicle a try, pull the old favorite out of your pocket and offer him that one too. When he is finished, slip the old favorite back into your pocket and try again with the newer toy.
Increasing Your Child’s Interest In New Things By Pairing Them With Old Favorites
Sometimes by pairing an old favorite with something new, a few times, you can increase your child’s interest in a new item. But remember, when trying to pair an old favorite with something new, it’s best to offer him the old favorite right after he has tried the new thing. In a similar way, when looking for new foods and drinks that your child might like to try, think about foods and drinks you know he already likes. For example, if he likes potato chips, you might experiment with a different kind of salty treat, like a corn chip, or a pretzel. If your child is willing to try the new treat, you can offer him a small piece of his favorite chip just after the new treat.
If you practice this a few times each day, you may begin to notice your child showing more interest in the new salty treat when it’s offered. Module 7 of this parent training program deals specifically with overly picky eating. In any case, it’s really worth the effort to try and increase the number of things your child enjoys. Remember, if you want your child to learn how to ask you for things, it will help to increase the number of things he is willing to work for.
Find A Special Place to Store Your PECS Binder
If possible, make a special place to keep your child’s binder when it is not in use. That way, both you and your child will know just where to look for it when you want to use it. It should be stored where your child spends a lot of his time. And you should make sure it is in a place that is clearly visible and easily within his reach. For example, you could keep it on a low bookshelf or small table. Some people tie a long piece of ribbon or string around the binding to make the binder easy to hang on a wall hook, a doorknob, or the back of a chair.
used with permission from PECSUSA.com
Remember though, that the PECS binder is not a toy, and you should discourage your child, and other children, from removing the pictures for any reason other than what they are for, which is to ask for something. Otherwise, the pictures might be missing when he needs them. Once your child becomes good at using the pictures to ask you for the things he wants most, missing pictures will be frustrating.
If you have decided on a special place for your child’s binder, try leaving the binder, with the front clearly visible, in its special place. Then move your teaching trials gradually further away from the binder. Do this until your child is able to go to the binder, remove the picture from the front cover and bring it to you to make his request. He should learn to do this no matter where in the room you are when your child first sees the item you have for him.
In the next clip, watch as the little boy goes to his picture wall to choose the picture of the toy he wants to play with. This family has chosen to display the pictures on a bulletin board to make it easier for their child to see all of the pictures and to take the one he wants.
used with permission from PECSUSA.com
In most cases, it is easiest to use a binder rather than a picture wall or bulletin board, simply because a binder is easier to carry around. However, if your child finds it hard to pick up pictures from a flat surface, it is fine to use a picture wall or bulletin board. In any case, there should be a specific place in which your child’s pictures are located. That way, he will know where to go to find them.
If you do use a binder, make sure to bring the binder wherever the child goes. What is important is that your child knows where to look for his binder when it’s not in use. When you are working on PECS training, he should be able to see it clearly. He will need to be able to walk to the binder, remove the picture on the front, and bring it to you to make his request. And he can do this anywhere in the room you are. Remember, at this point in PECS training you are still only working with one item and one picture at a time. You will be the one to choose which item you are going to work with and you will place the picture of that item on the front cover of the binder. Don’t worry! We will show you how to teach your child to make his own choices, but right now, we are still working on only the most basic parts of PECS.