

Receptive Objects and Animals
Once your child is good at matching, you’re ready to begin working on language skills. We will begin with “receptive” language skills. Receptive language refers to the ability to understand what other people say. We call it “receptive language” because the child is receiving the language, rather than producing it. The purpose of this part of the module is to teach your child to understand the words you are saying. Your child will learn to show you that he understands words by touching the object or picture that you have named. Or he can point to it or hand it to you. So, for example, if your child has a cup, a shoe, and a block in front of him, and you say the word shoe, he will point to the shoe. If you say the word cup, he will point to the cup, and so on.
We’ll begin with single words that refer to objects and animals. Then we’ll add the names of familiar people, actions, body parts, colors and shapes.
Receptive Objects and Animals
First, we’re going to work on teaching the child to understand the words for common things. It’s always important to teach skills that are useful and meaningful for your child. You should pick things that will be important, everyday words. Try to start with words for things that fall into the categories of food, clothing, vehicles, furniture and animals. You can also begin with words for common household objects, like toothbrush, comb, spoon, fork, plate, cup, T.V., and stove. Here is a sample list of words to teach, by category.
| Food/Drink | Animals | Clothing | Vehicles | Furniture | Miscellaneous |
| Apple | Dog | Sock | Car | Table | Cup |
| Cheerios | Cat | Shirt | Truck | Chair | Spoon |
| Cookie | Cow | Shoe(s) | Airplane | Couch | Puzzle |
| Bread | Horse | Pants | Train | Bed | Scissors |
| Yogurt | Bird | Shorts | Boat | Dresser | Toothbrush |
| Hamburger | Elephant | Dress | Bus | Desk | Pencil |
| Banana | Giraffe | Coat | Helicopter | Stool | Crayon |
| Cheese | Pig | Boots | Van | Bench | Paper |
| Milk | Sheep | Gloves | Motorcycle | Bookshelf | Hairbrush |
| Juice | Rabbit | Hat | Tractor | Cabinet | Comb |
A Word of Warning About Adding “Toys” as a Category
Even though you might think of toys as a great category, it’s best in the beginning to stick with toys that are not used for pretending. So, puzzle and ball, for example might be good. But it would be best to stay away from toy animals, dolls and doll furniture, toy vehicles, etc., These can be used for pretending, and can be confusing. When you say “car” do you mean the real car or a toy car? Is it a vehicle or a toy? It’s better in the beginning to use pictures of real objects and animals or the objects themselves, and then you can work on the toys that look like them later.
Finding Pictures
You can find these pictures very easily on the Internet using Google or another search engine. Pictures on this module and all the other modules are downloaded from public domain pictures, so feel free to copy or download them and use them for teaching your child. You’ll need these same pictures for other programs later on, such as the ‘Categories’ Teaching Program, so be sure to save them. If you can laminate them or cover them with plastic sheeting from an office supply store, they’ll last a lot longer!
Choose Words From Different Categories
Here’s another important point. When deciding which three words you will start with, you should choose words from different categories. This should help your child learn the words more quickly than he would learn new words from a single category. For example, you could work on Cheerios (or “O’s”), cat, and car together, but not Cheerios, crackers, and cookies. That would be harder because those things are similar. But – there will be a few exceptions to that rule. The exceptions to this will be colors, shapes, people’s names, and action words, which we’ll talk about soon.
Choose Words That Will Be Meaningful to Your Child
When you teach the words for animals and objects, try to use words that will be most important for your child. For a child who has an interest in vehicles, you would want to include some vehicles, like car, train or airplane. For a child who lives on a farm, has a pet, or just likes animals, you might want to teach the names of some animals early on. The child will learn better using materials in which he is interested. Almost every child has favorite foods and drinks, and all children wear clothes and use furniture. So, a typical starter list of the first ten words to introduce might be like this:
Begin with:
- Cookie Dog Car
Then add the following, one at a time:
- Bed
- Cup
- Shoe
- Milk
- Spoon
- Shirt
- Cat
You Can Use Pictures or Objects for this Teaching Program
One good thing about pictures is that your child is less likely to want to play with them. And pictures show real animals, vehicles, furniture, and other large items. Also, pictures are easier to store and handle compared to real objects. If your child is good at matching pictures to objects, this can be a good way for him to learn and understand the names of these things. But use your judgment and try out both pictures and objects to determine which method works best for your child. In this program, we’ll describe the procedure using pictures. You can follow the same steps with objects.
Teaching Receptive Objects and Animals
Start by placing three pictures of different objects on the table in front of your child. As with some of the teaching programs we’ve talked about so far, it’s best simply to use the name of the object as the instruction. For example, say you have placed pictures of a cup, a bed, and a train in front of your child. Label one of the pictures, for example, say, “Bed.” Then prompt him to touch the picture of the bed by moving his hand to the picture of the bed. Or you can prompt by pointing to the picture of the bed. And, of course, remember to reward your child with praise and maybe even a little treat if you think he might like that. Later, you can use a little longer instruction like “Touch bed,” or “Point to bed.” But it’s best to save these longer instructions for after your child has learned the word for object you are teaching.
- Place three pictures of different objects on the table in front of your child.
- Give a clear and simple instruction. For example, “Bed” or “Touch bed”.
- Use a prompt you think will work. You will use smaller prompt over time.
- Reinforce your child for touching or pointing to the correct picture.
As your child progresses and understands more language, you can be more flexible with your instructions. For example, you could instruct your child to “Touch the cup,” “Show me the cup,” or “Point to the cup.” You can also hold out your hand and say, “Give me the cup” or ask, “Where is the cup?” When praising your child, it’s good to use the word again, such as saying, “YAY! You did it! You found the cup!” or “Super job finding the cup!”
Test to See If your Child Already Knows Some of the Words
It’s also a good idea to probe and see if your child is able to pick the new item on the very first try. As always, simply give your child the instruction, but don’t prompt him. If he responds correctly 3 times in a row with the items in different positions and no help, great! Give him lots of enthusiastic reinforcement, and assume he knows that item. If he doesn’t respond, or responds incorrectly, just place his hand back in his lap if necessary, pause briefly (for two or three seconds) and then start another trial, but this time, prompt him right away and reward him enthusiastically for following your prompt.
Start with an assortment of three different pictures (or objects) and prompt only the ones your child needs your help with, gradually fading your prompts until he is responding correctly when you label or ask him to touch any of the pictures. Once all three pictures are mastered, meaning that he is responding correctly in at least 8 out of every 10 trials, then you can add a new picture, and present it with 2 of the already mastered pictures.
Present Pictures in an Unpredictable Order and In Different Positions
Continue to present the new picture, always in a field of three pictures. Remember to keep practicing all of the ones your child has learned. And, as always, be careful not to present the pictures in a predictable order, such as alternating them, (for example, you would NOT want to say, “touch cat”, “touch train”, “touch cat”, “touch train”, “touch cat”, “touch train”…). Also, do not always present the correct choice in the same position. Children can pick up on this and then they can get it right without really understanding what you’re saying. It’s important that your child learn to pick the picture that you ask him for, no matter which other two pictures are on the table, and regardless of where it is in the line-up.
Give Plenty of Opportunities to Practice with Words He Has Learned
Once your child has learned the fourth picture, you can add a fifth, always laying it out with two of the pictures your child has already learned. You should have the new picture on the table all or most of the time, but you can change the other two pictures as often as you need to, to make sure your child has an opportunity to practice all of the words he has learned. Make sure that your child can consistently pick out the picture you label when both his new picture and the one he learned most recently are both on the table at the same time. Then continue to add new pictures, one at a time.
By presenting the new target, along with pictures that have already been learned, all of the pictures can be practiced daily (and preferably several times a day). As we’ve said before, maintenance or continued practice of previously learned skills, is very, very important. In fact, there are many experts who believe that a child should spend at least 70% of his special learning sessions on practicing already learned skills and only about 30% in learning new skills. This will help your child to remember the words he’s learned. Also, repeated practice will help make new language automatic; that is, he won’t have to think hard about what the word means. For that to happen, he will need a great deal of practice with each new word. It’s better for him to learn new words a little more slowly but to have each word be really solid and automatic, rather than to learn a lot of new words but not have enough time to practice them.
Keep a List of the Words Your Child Has Learned
It’s a good idea to start keeping a list of all of the words your child is learning. (See example below.) Many of the teaching programs you’ll be using later will build on the words he knows. For example, later on when you begin working on teaching your child about categories, you will begin with mastered words in each of the categories below. Each time he learns to understand a new word, you can add it to the list of mastered words in your Receptive Labels teaching program. You will know he has learned a word well when he gets it right at least 8 out of every 10 trials. Here are some examples, but these are just suggestions. Use the words in each category that your child is likely to hear in his natural environment.
| Food/Drink | Animals | Clothing | Vehicles | Furniture | Miscellaneous |
| Apple | Dog | Sock | Car | Table | Cup |
| Cheerios | Cat | Shirt | Truck | Chair | Spoon |
| Cookie | Shoe(s) | Airplane | Bed | Puzzle | |
| Bread | Pants | Train | Toothbrush | ||
| Yogurt |
Practice Mastered Words in the Natural Environment
It’s also important to use the words your child has learned in his special learning sessions all through the day. Try to do this as these words arise in daily life. For example, say your child has done well learning to understand the word “cup” during his learning trials. In that case, you would want to look for chances to use the word “cup” in the natural environment. So, at dinner, you could put your hand out and say “Cup,” or “Give me cup please.” And when your child hands you his cup, you pour in a small amount of one of his favorite drinks and hand it back to him. By pouring in only a little, you make it more likely that he’ll either ask you for more, or that you’ll have more chances to practice the word cup during that meal.
Be Sure to Use Several Different Pictures for Each New Word
And here’s another important point. When your child learns a new word using a single picture or object, find other pictures to work on that same word. So, if you teach the word “cup” using a picture like this:
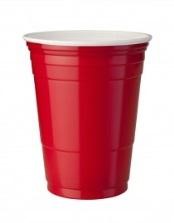
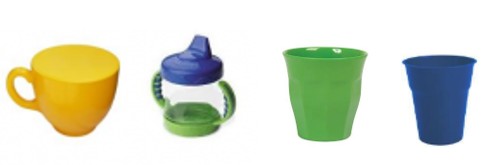
be sure he can also point to some different pictures of cups or some real cups, when you say the word “cup” or ask him to “Touch cup.” Here is a set of pictures of different looking cups.
You could test each picture by presenting it with pictures of other things he knows. So, if he has learned the words “shoe” and “dog”, put a new picture of a cup on the table with pictures of a shoe and a dog. Then say, “Touch cup” or “Point to cup” or just “Cup.”
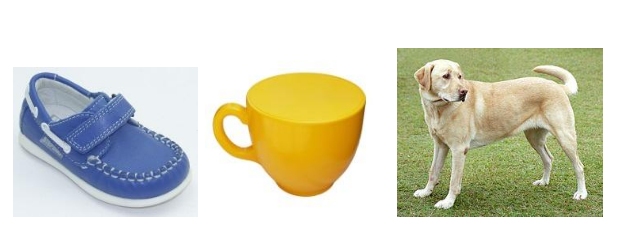
Don’t be surprised, or upset, if your child doesn’t pick the right picture when you first use a new example of something that he’s already learned. For example, if he learned to give you this when you say “cup”:
he may not recognize this:

as a cup.
This happens often. Just keep showing your child new examples of the things he has learned until he can point to the right object or picture the first time you show him something new. Keep teaching him different examples of “cup” until he understands what a “cup” is and knows that “cup” refers to more than just one type of cup.
Now, let’s talk about teaching colors, shapes, people, and actions. Here’s some good news! The way to teach your child to understand these words is the same as what we just explained for teaching animals and objects. The only difference is that you will teach the colors separately, along with other color words. This is a different and specific teaching program. So, you will have one program called Receptive Objects and Animals. In this program, you will teach objects and animals like cup, shoe, and dog. Then you will have another program called Receptive Colors. In this section, we will also talk about three more programs called Receptive Shapes, Familiar People, and Action Words – Receptive. (Remember, “receptive” means what the child understands, not what the child says.)