

Outdoor And Indoor Play

GAMES FOR OUTDOOR PLAY
The following are activities that you can do with your child outside, such as in a park or playground.
1. ROUTINES FOR PLAYING ON THE SLIDE THAT TEACH LANGUAGE, TURN-TAKING, AND NONVERBAL COMMUNICATION
Playing on the slide is a good activity for teaching “up, up, up” and “down, down, down” as well as “ready, set, go!” If the ladder to the slide is high for your child’s size, climb up behind her to keep her safe. Then you can also keep her from sliding down too soon or give her a gentle push when it’s time for her to go down the slide.
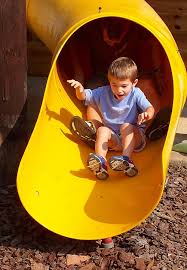
Try using repetitive language and the CLOZE (filling in) procedure to teach words like “up,” “down,” and “go.” For example, as your child is climbing the ladder say “You’re going up, up,” (then pause). Then gently hold your child’s arm or shoulder to stop her from taking the last step, in order to encourage her to say the word “up.” If she can’t say “up,” but tries to make the sounds, that’s great. If she doesn’t try, then you say “up” and let go of her arm so that she can reach the top of the slide.
When she reaches the top and is ready to slide down, hold her shoulders and say, “Ready, set, _____.” Then, pause to see if she will say “go.” If she does, let her slide down right away. Or, you could – give her a gentle push if she likes that. You can cheer for her until she reaches the bottom. If she doesn’t say “go,” prompt her by saying the first sound of the word “G.” If she still does not say the word or if she only repeats the “g” sound, just say the word for her and let her go down the slide. Instead of saying, “Ready, set, go!,” you can say, “Down, down, down!” In that case, you would just pause before saying the word “down” for the third time. Then, wait for her to make eye contact and/or for her to fill in the word “down” if she can.
If the slide has a small ladder that she can easily climb, you can stand at the bottom and have her slide through the “mommy tunnel” by putting one foot on either side. Be sure to give her lots of praise and tickles for trying to say new words.
If you are at a park or playground with other children who are also playing on the slide, this can be a nice chance to work on waiting and taking turns. If your child finds it hard to wait her turn, you can practice when you have the slide to yourselves. Have your child’s stuffed animals take turns with her sliding down the slide. You can call out each stuffed animal’s turn, as well as your child’s turn, saying, “Teddy’s turn, Elmo’s turn, Baby’s turn!” Be sure to make the stuffed animals climb up the ladder to the slide, but make their turns quick so that she doesn’t have to wait very long for her turn. Praise her for nice waiting after each of her stuffed animals takes a turn. Just before her turn say, “Great waiting!! Now it’s Baby’s turn!” This way, her turn to slide is a natural reinforcer for waiting nicely and taking turns.
Over time, you can make her stuffed animals take slightly longer turns. This way, she will have some practice waiting about as long as she would for another child. Then you can begin to let her practice taking turns with one other child at a time, praising her for being a good turn-taker.
2. PUSHING YOUR CHILD ON THE SWING TO WORK ON EYE CONTACT, NONVERBAL COMMUNICATION SKILLS, AND LANGUAGE

Pushing your child on the swing is one of the best and easiest activities for improving your child’s eye contact. Stand in front of your child and give her a few good pushes from the front. If she is looking at you, keep it going. When she looks away for more than a few seconds, gently catch the swing with both hands and hold it still until she looks at you. Then, give her a big smile and say “push” as you begin pushing. Repeat this for as long as your child is enjoying it.
You can also try singing a song with her while she is swinging and then suddenly stop singing when the swing stops swinging. Start singing again after she looks at you and you begin pushing just as you start singing.
Over time, your child should look at you for longer and longer periods, sharing the experience with you instead of just enjoying it by herself. And she should learn that looking at you is a way of communicating with you. Then, you can also begin to work on more communication by prompting her to add a word, like “push” or “go” to the eye contact before you push her again.
Of course, you’ll want to be sure she’s holding on tight again before you give her a push. This is true even if she is in a toddler safety seat because, eventually, you want her to be safe on the swing when she is swinging all by herself.
babysignlanguage.com
3. BUBBLES FOR WORKING ON EYE CONTACT AND REQUESTING
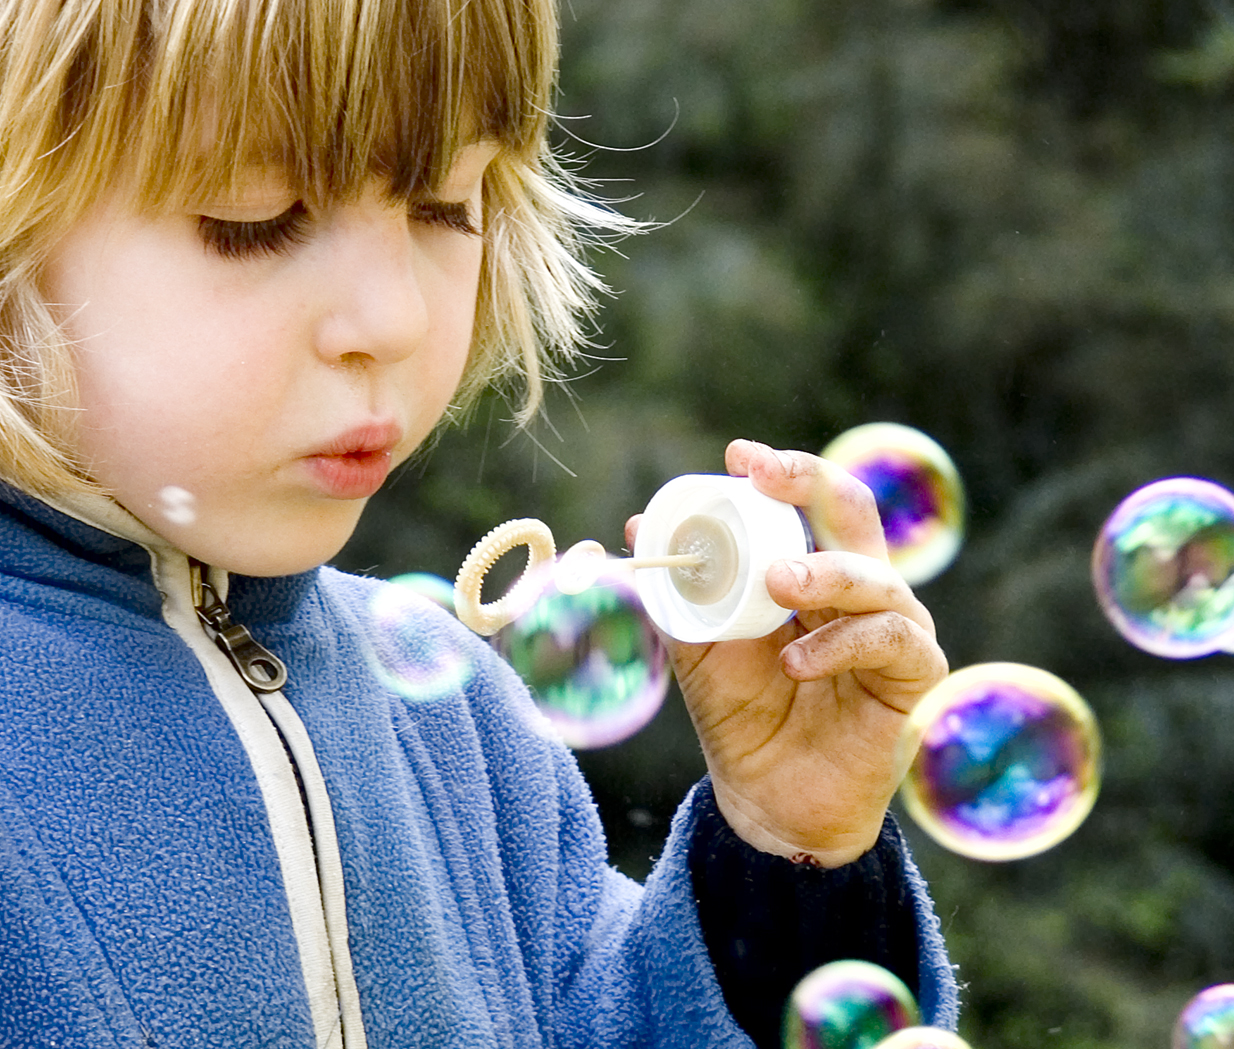
In this activity, you could work on pointing and eye contact, imitating a sound, or imitating blowing. You can pick which you think your child would find easiest to learn and do that one first.
Bubbles are a lot of fun but also great for working on eye contact and requesting. Blow some bubbles and encourage your child to chase after them or pop them. Do this several times, making a really fun game of it. As soon as you can see that your child is really enjoying the game, hold the bubble wand to your lips, pause, and look at your child. As soon as she looks at your eyes, say “Bubbles!” in a happy tone of voice, and blow more bubbles for your child to enjoy. You can do this over and over because most children don’t get tired of bubbles very quickly. Once your child is good at making eye contact with you as you play with bubbles together, start teaching her to request the bubbles by pointing, paired with eye contact. You can also teach her to request bubbles by saying the word, “bubbles” or even the “b” sound. Just prompt and reinforce whatever you want your child to say or do and then fade your prompts over time until your child is asking you to blow more bubbles all by herself.
And remember, you really don’t need costly toys and games to work on building play skills and engaging with your child outdoors. Bubbles are so much fun and very easy to get or make. And many things found in nature can be just as much fun. Take a walk and collect things like sticks, leaves and pinecones in a bucket or pail. Practice words like IN and OUT. In the next clip, watch how a teacher is using just sand and some sticks they have collected in a child’s pail to keep a small boy engaged and having fun.
GAMES FOR INDOOR PLAY
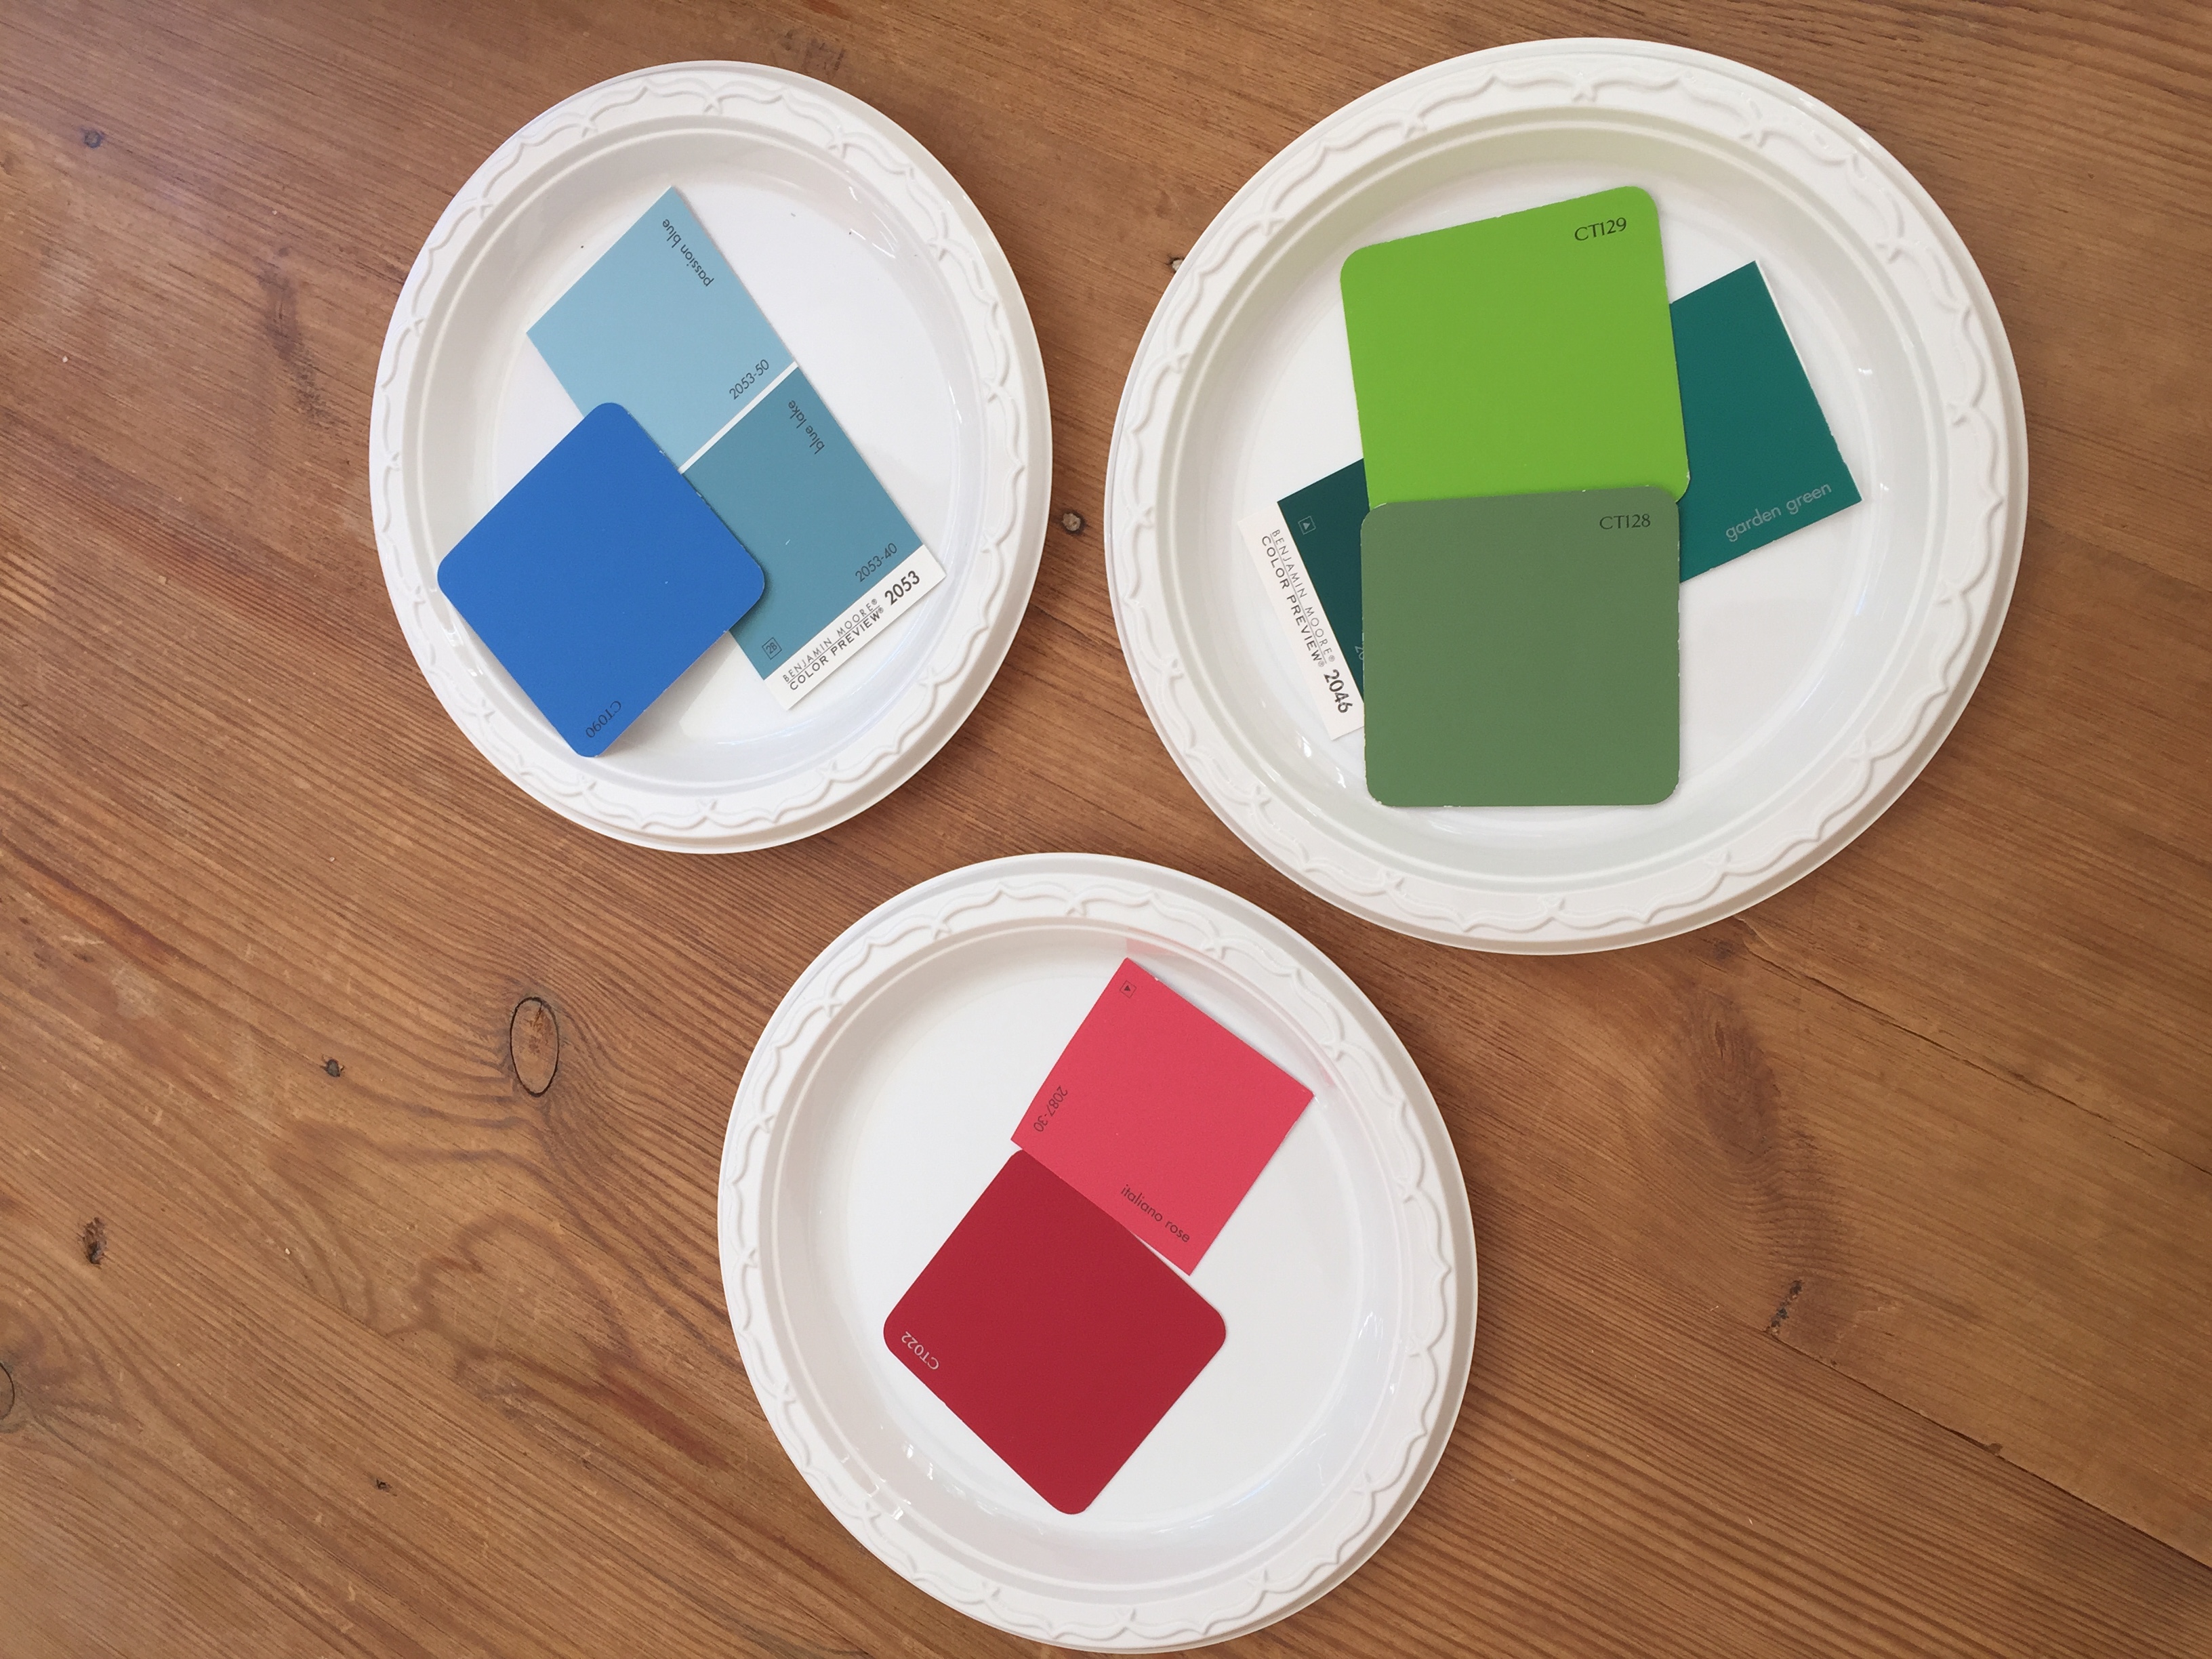
1. TWISTER MAT TO WORK ON COLOR MATCHING, COLOR WORDS, AND COLOR-OBJECT COMBINATIONS
If you have a Twister Game, you can use the mat for teaching your child how to match and sort by color. Or you can make a twister mat yourself by coloring large circles like these on pieces of paper that you tape together. You can even put pieces of colored paper in rows on the floor.
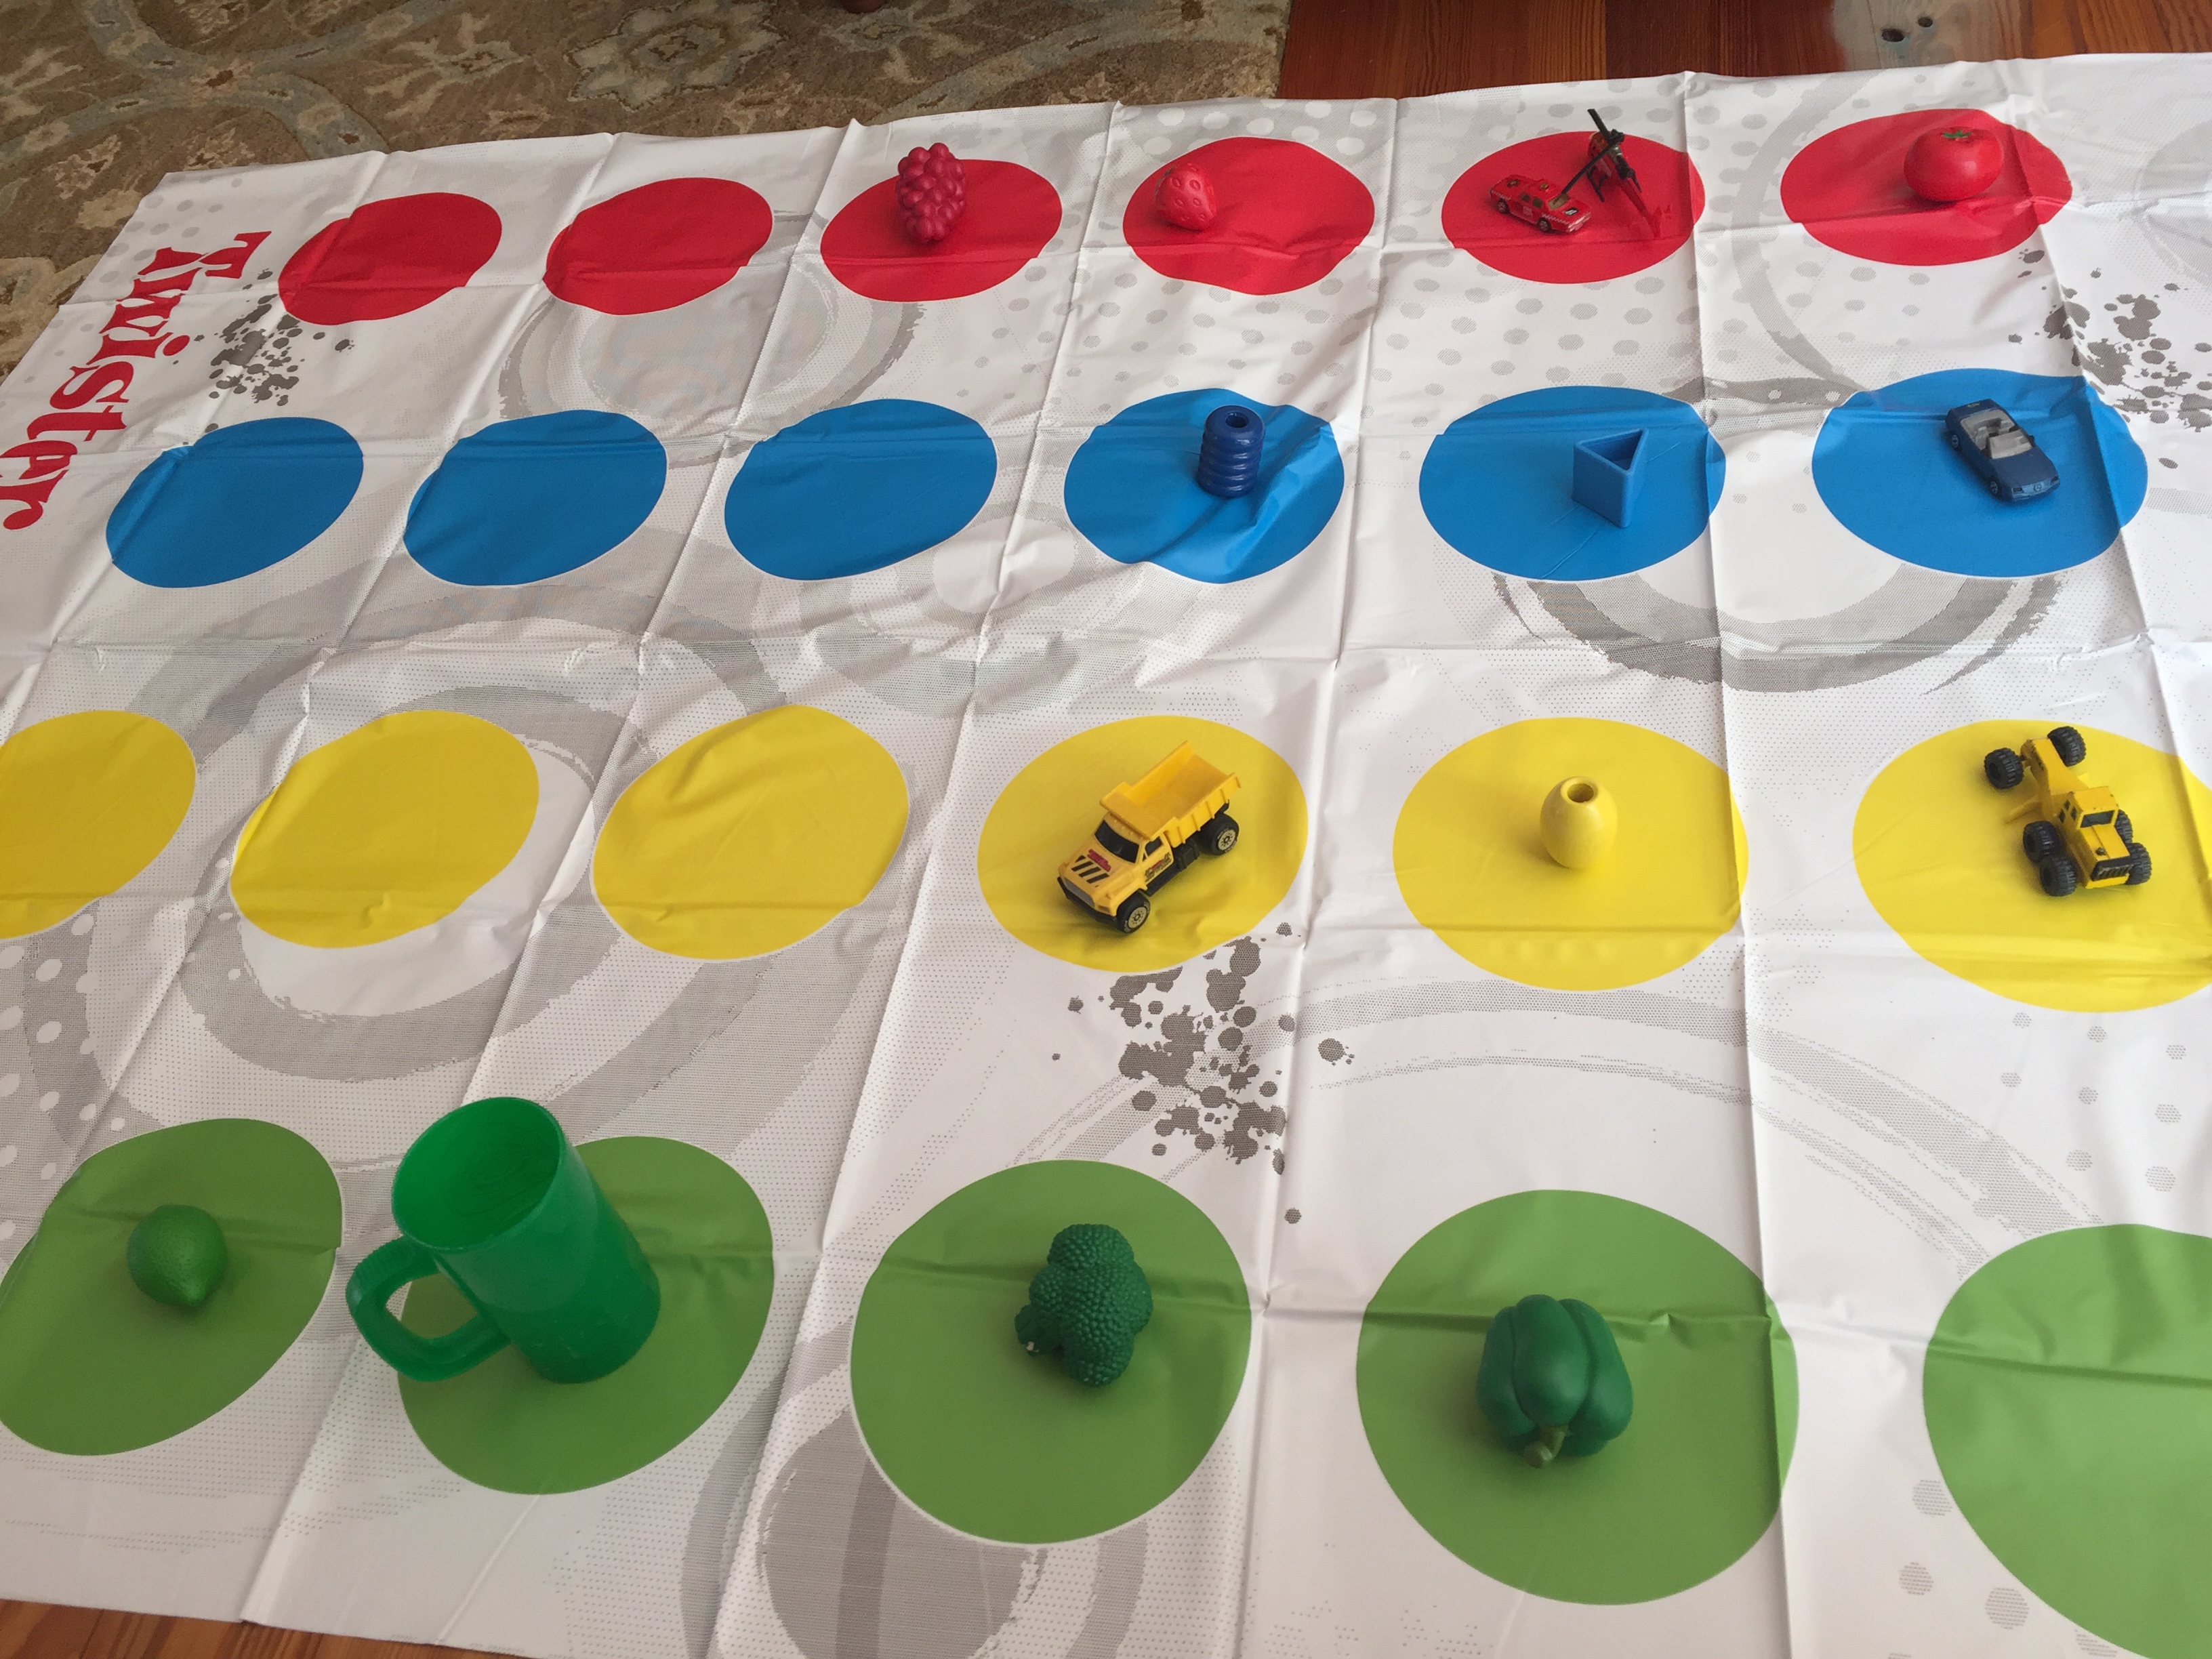
Collect some objects with bright colors, like red, yellow, blue and green, from around the house. Teach your child to walk to the mat and put a red object on a red circle, a blue object on a blue circle and so on. Try to find objects that will also teach words. For example, if you are working on teaching your child the words for clothing, use small articles of clothing, like your child’s socks. If you are working on the words for shapes, you could use blocks of different shapes or sizes. If you are working on the words for foods, you could use toy food, or even real fruits and vegetables. You can do the same thing with toy cars, plastic cups and spoons, or brightly colored bath toy animals. Paint chips from the hardware store make excellent color matching materials, too.
Just hand your child a colored object and say, for example, “Put the red apple on a red circle.” Point to one of the red circles if your child needs a little help or walk her over to one of the red circles if she needs more help. When you praise your child, be sure to use the color word. For example, you might say something like, “Good for you! You found red!” Or, “Yay! Red car on red circle!”
As your child’s language improves, offer her choices. For example, you might ask, “Would you like the green car or the green block?” You can also just hold up the two objects and ask, “Which one do you want?” She can make a choice by pointing or with words. Getting the object she chose should be a nice, natural reinforcer for having made a choice.
2. PUZZLES AND OTHER TOYS WITH LOTS OF PIECES FOR WORKING ON REQUESTING AND MAKING CHOICES
Some toys work especially well for requesting. We have talked about teaching your child to make requests using puzzles and other toys, but it is worth repeating here, especially for a very young child. Toys with multiple pieces are ideal because you don’t need to take one piece away in order for the child to request the next piece. Also, these toys allow you to become an active part of your child’s play. For example, if your child likes to do puzzles, simply remove some of the pieces of the puzzle before handing her the puzzle board. Once she puts a piece or two in she will probably want to finish the puzzle and will be looking for the remaining pieces. You can hold up the pieces in front of her, one at a time, and require her to request them from you by pointing at them and then looking at you.
You can do the same thing with toys like shape sorters, peg boards, and even Mr. Potato Head. And if your child can already make requests using a point, you can teach her to make choices by holding up two pieces of the toy each time. And, of course, if your child is ready, you can teach her to make requests using words. For example, you could hold up Mr. Potato Head’s nose and one of his arms and ask your child to tell you which piece she would like to put in next. Prompt her to say the name of the object by saying the word yourself (e.g., “arm”). As soon as she says the word or an approximation for the piece she wants, hand it to her immediately.
There are many different kinds of puzzles designed to teach children about things like colors, shapes, animals, vehicles, numbers, letters, and so on. If your child reaches or points to one of the choices, prompt her to say the name of the object by modeling it. For example, if she is requesting the pieces of an animal puzzle, you might hold up a horse and a chicken. If she reaches for the horse, prompt her to say, “Horse.” Asking your child to make a choice to let you know which piece she wants, is a great way to practice saying words.
3. PUZZLE PIECE SCAVENGER HUNT
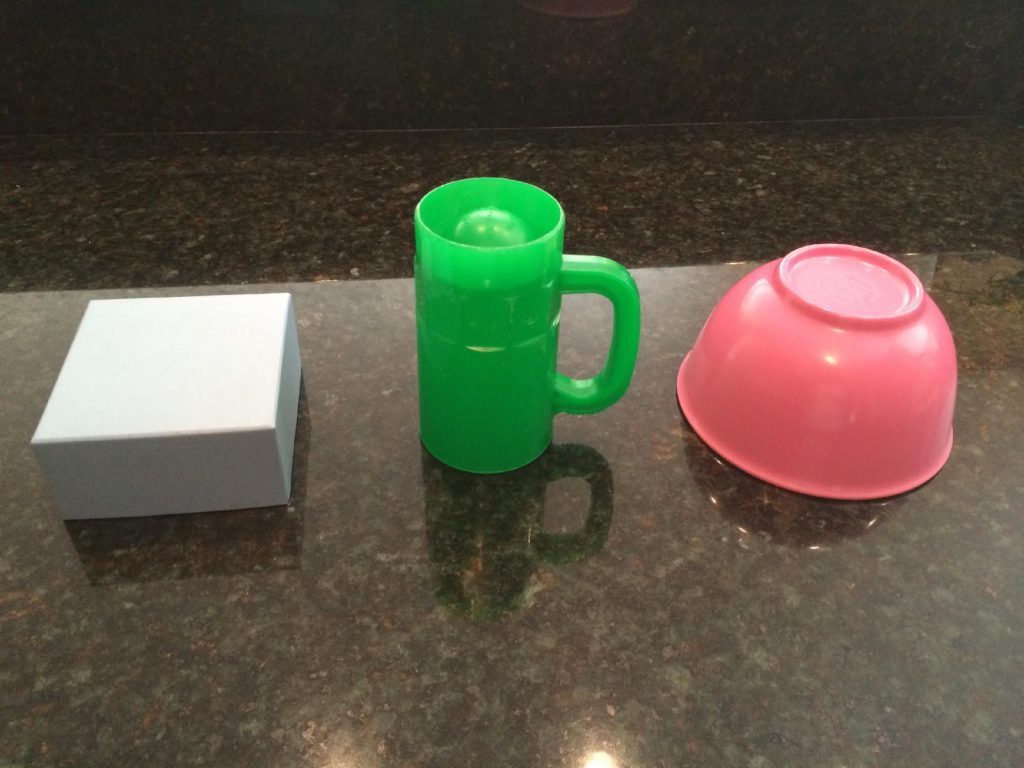
This is a great game for working on the word “under.” It can also help you teach your child that she can figure out where something is by figuring out where you are looking. Line up a small box, cup, and bowl.
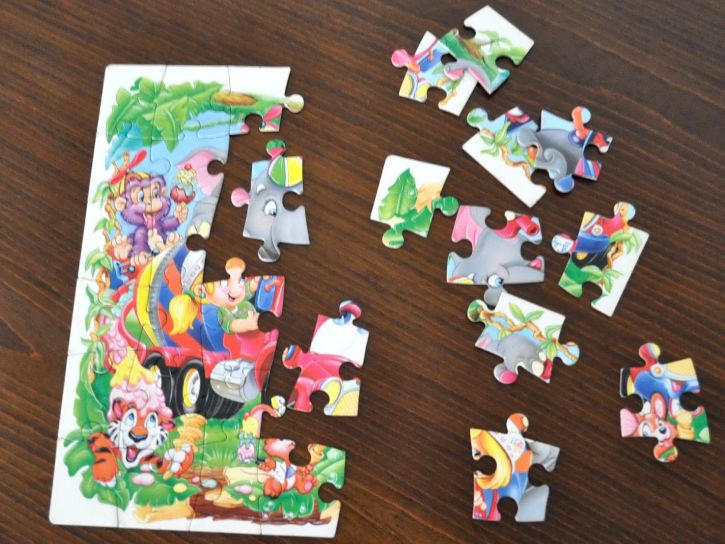
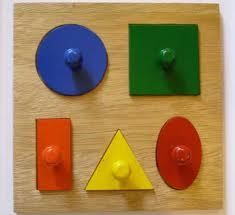
Choose a puzzle that your child especially enjoys and can easily put together. If she likes animals, you might want to choose an animal puzzle. Or, if she likes shapes, a shape puzzle like this one might be a good choice.
Publicdomain.net
Remove the pieces and hide one of the pieces under the box, one under the cup and the other under the bowl and remember where you have placed each piece. If there are remaining pieces, simply leave them in the puzzle board. Point to one of the empty spaces on the puzzle board, for example, the triangle, and say something like, “Uh oh!” The triangle is missing! Let’s look under the cup!” Point to the cup if you think she needs a little help or help her to lift the cup if you think she needs more help. Cheer her on as she finds each piece in turn, by following your instructions. Finding the pieces to one of her favorite puzzles will also be a natural reinforcer. You can do the same thing using the pieces of a Mr. Potato Head toy to work on body part vocabulary. You could even hide larger items under pillows and blankets that are spread around the room. Have fun with it!
As you fade your prompts, see if your child can follow your eye gaze, even when you don’t point. At first, turn your head and lean over toward the object. Open your eyes wide and stare at the object you want her to find. Make sure the three objects are far enough away from one another that she will be able to tell which one you are looking at. Gradually, over time, you can “show” her where the object is, using more subtle cues. For example, instead of leaning toward the object, just turn your head toward the object and stare at it.

4. BUILDING BLOCK TOWERS
This activity is an opportunity to work on the words “tall,” “fall,” “crash,” and “down.” Very young children really enjoy knocking things down, the taller the better! Help your child to stack blocks into a tower. Sometimes children find it much easier to pick things up than to let them go, so your child may need a little extra help placing the blocks on top of the tower without knocking the tower over too soon. Use a repetitive language approach to build the suspense, saying, “Build it up, up, up…and knock it….down!” Or, you could just say, ‘Up, up, up’ as you stack the blocks, and then ‘Down!’ as you knock the tower down. You can use the CLOZE (filling in) procedure here, by doing this a few times and then pausing before you say the word “down.” This will give the child an opportunity to say the word “down” by herself while she knocks the tower down.
If you think your child is ready, try to use some different words. For example, instead of saying “Up, up, up,” you could say, “It’s getting taller, and taller, and taller! Look! It’s SO TALL!” Or, if the tower starts to teeter back and forth, act very excited or scared and say, “Uh-oh!!! It’s going to fall down!” And, when you manage a really tall tower, try out the word “crash!” when it comes time to knock it down.
5. BALLOON PLAY
This is a great way to work on the words “up,” “down,” and “1,2,3.” Helium balloons are another great way to teach the words “up” and “down.” Make sure you have an extra-long string or ribbon attached to the balloon before you let it fly to the ceiling. Say something like, “Up, up and away!” as it flies upward. Then let your child reel it in as you chant, “It’s coming down, down, down!” Once this routine becomes familiar, you can use the CLOZE (filling in) procedure to encourage your child to use the words “up” and “down.” For example, after the balloon is up, start to pull it down just a little and say, “it’s coming down, down….” Then, pause and wait for the child to try to say “down” before handing her the string with which to pull it down. If she doesn’t, try prompting (“down, down, ‘d’…”) and if she still doesn’t say the word, pause for a minute, then complete it yourself (“down, down, down”). Then, let her pull it the rest of the way down.

As helium balloons deflate over a few days, they are great for playing catch or for kicking because they move so slowly. For this reason, they are an easy target, making it very easy for the child to be successful when she tries to catch or kick them. If you have regular balloons, try blowing them up and then letting them fly around the room. You can teach ‘1, 2, 3!’ with the balloon by saying ‘1, 2..’ then pause before you say ‘3’ as you let the balloon go. After you do this a few times, you can wait for the child to say “3,” and then reward her by letting the balloon fly. Sometimes children are afraid of the balloon flying around the room because it makes a lot of noise. If that is the case with your child, you could try to only blow up the balloon about a third of the way before letting it go or let her stand across the room. If she’s still afraid, just move on to something else. You can also use the flying balloon game to work on requesting. Let her pick up the balloon when it comes to rest and hold out your hand; require her to bring it back to you and make eye contact before you repeat the game. NOTE: Stay close enough to take the balloon away if she tries to put it in her mouth- This can be a choking hazard.